

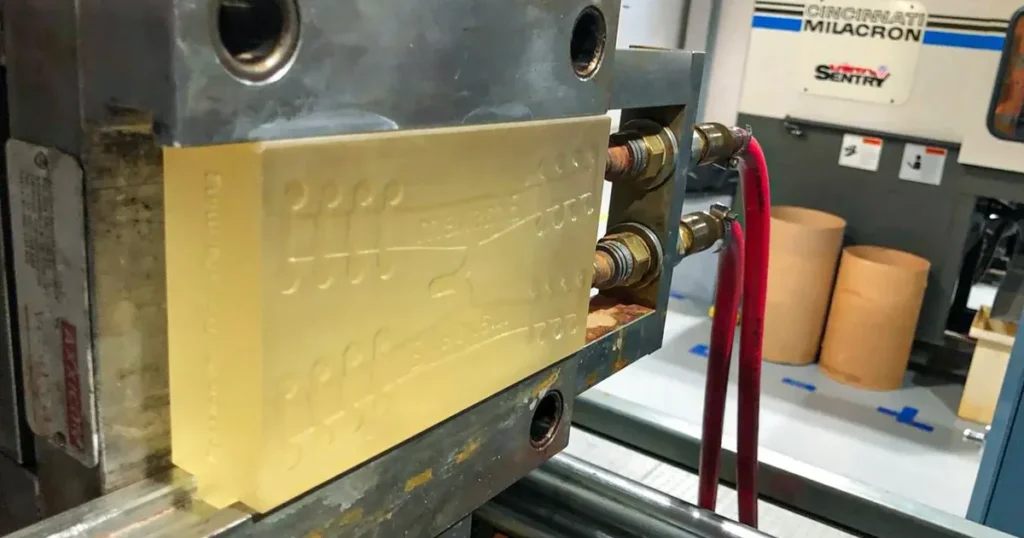
Learn how to design, print, and use 3d printed molds for silicone, resin casting, and small batch production at LAVA3dp. Avoid common pitfalls, save tooling costs, and optimize your 3D printer settings today!
What Are 3D Printed Molds?
Traditional manufacturing separates the worlds of digital design and physical replication by a massive wall of tooling costs. 3D printing bridges this gap. Using standard desktop fabrication hardware, engineers and designers can now build functional cavities directly from digital CAD files. This process circumvents the need for multi-week lead times from external machine shops.
How 3D Printed Molds Work
A 3D printed mold serves as a functional negative cavity or a master positive pattern. In a direct setup, you print the inverted shape of your final part, apply surface treatments, and pour your casting material directly into it. In an indirect setup, you print a high-resolution positive master part, pour silicone around it to create a flexible cavity, and then use that silicone shell for final casting. The process utilizes standard additive layers to construct physical walls capable of holding liquids, standing up to exothermic reactions, or resisting mechanical compression.
Types of Molds You Can Create with a 3D Printer
- Two-part poured molds: Split cavities with registration pins for enclosing casting compounds.
- Thermoforming and vacuum forming tools: Perforated rigid shapes built to withstand atmospheric pull and hot plastic sheets.
- Direct injection inserts: High-temperature plastic blocks clamped inside metal mold bases for low-volume injection cycles.
- Open-face sprue molds: Single-piece designs ideal for flat-backed parts or simple decorative castings.
When 3D Printed Molds Make Sense Over Traditional Tooling
CNC milling and EDM (Electrical Discharge Machining) produce pristine steel or aluminum tools, but they require substantial capital. Utilizing a 3d printed mold makes sense when your production run is small—typically between 1 and 500 units—or when your design requires validation before committing to expensive metal cutting. If you need to test a functional handle, iterate on an enclosure design, or supply a specialized component for a custom order, additive tooling delivers functional parts in a fraction of the time.
Related: 10 Best 3D Printers for Small Businesses to Start Making Money in 2026
Benefits of Using 3D Printed Molds
Shifting your tooling strategy from traditional subtractive methods to additive manufacturing transforms the economics of low-volume production. It eliminates massive upfront investments and introduces design flexibility that conventional machining cannot match.
Faster Prototyping and Product Iteration
Traditional tooling changes mean modifying a tool path, waiting for machine time, and re-cutting metal. With additive methods, a design change takes minutes in CAD. You update your digital model, send it to your slicer, and run a new print overnight. This speed lets you execute multiple rounds of physical rapid prototyping and rapid tooling evaluation within a single week, dramatically shortening your development cycle.
Lower Tooling Costs for Small Runs
Hard tooling can cost thousands of dollars before a single production part is made. A standard desktop print requires only a few dollars worth of polymer resin or filament. Even when factoring in labor for post-processing and surface preparation, the financial risk of a design error drops to nearly zero. This cost-efficiency makes small batch manufacturing molds accessible to small businesses and independent product designers.
Ideal for Custom and Low-Volume Manufacturing
When market demands lean toward hyper-customization—such as bespoke medical devices, specialized aerospace brackets, or limited-run consumer goods—traditional manufacturing fails economically. Additive mold making enables low-volume manufacturing and prototype manufacturing to co-exist profitably. You can manufacture 10 custom parts for a field trial without worrying about amortizing a five-figure tooling bill.
Design Freedom and Complex Geometry
CNC milling cutters require physical access to a block of metal, which limits undercuts, sharp internal corners, and complex internal channels. 3D printers build layer by layer, granting immense freedom. You can incorporate internal cooling lines, complex organic textures, and complex interlocking features directly into the mold body without increasing production complexity.
Choosing the Right Type of 3D Printed Mold
Selecting your mold type depends entirely on your final casting material and production goals. Different chemical processes require specific mechanical and thermal properties from your printed tooling.
Silicone Casting Molds
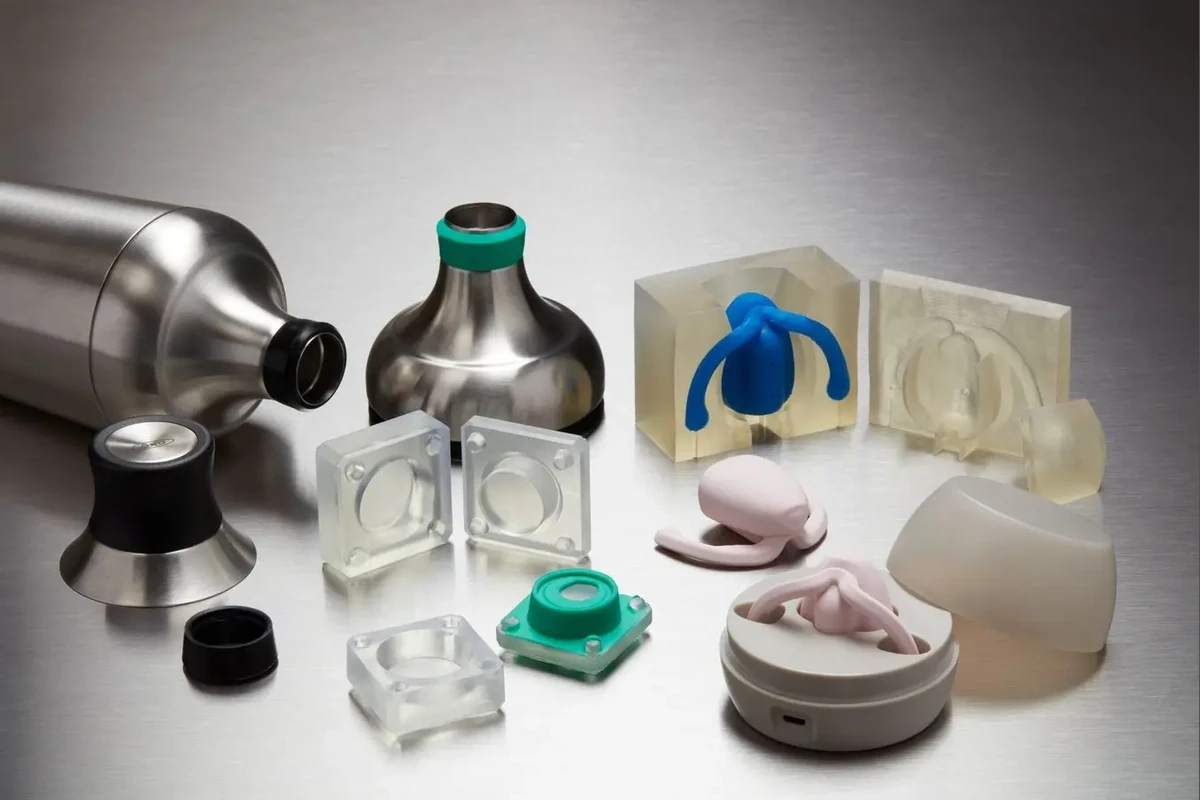
Creating flexible parts requires a rigid mold frame. When configuring a 3d printed silicone mold setup, you print a rigid plastic box containing the negative space of your object. Liquid silicone rubber is mixed and poured into this plastic frame. The rigid walls hold the shape perfectly against the hydrostatic pressure of the dense liquid silicone, ensuring high dimensional accuracy for the cured elastomer.
Resin Casting Molds
For epoxy resin casting or urethane casting, the process often flips. While you can cast resin directly into specialized 3D prints, the rigid-on-rigid nature can make demolding difficult. Product developers frequently choose to perform making molds with 3d printing by creating a flawless positive master part, casting a flexible silicone jacket around it, and using that secondary tool for high-volume silicone mould resin casting. If you prefer direct casting, the print must feature flawless draft angles and excellent chemical resilience against curing heat.
Vacuum Forming and Thermoforming Molds
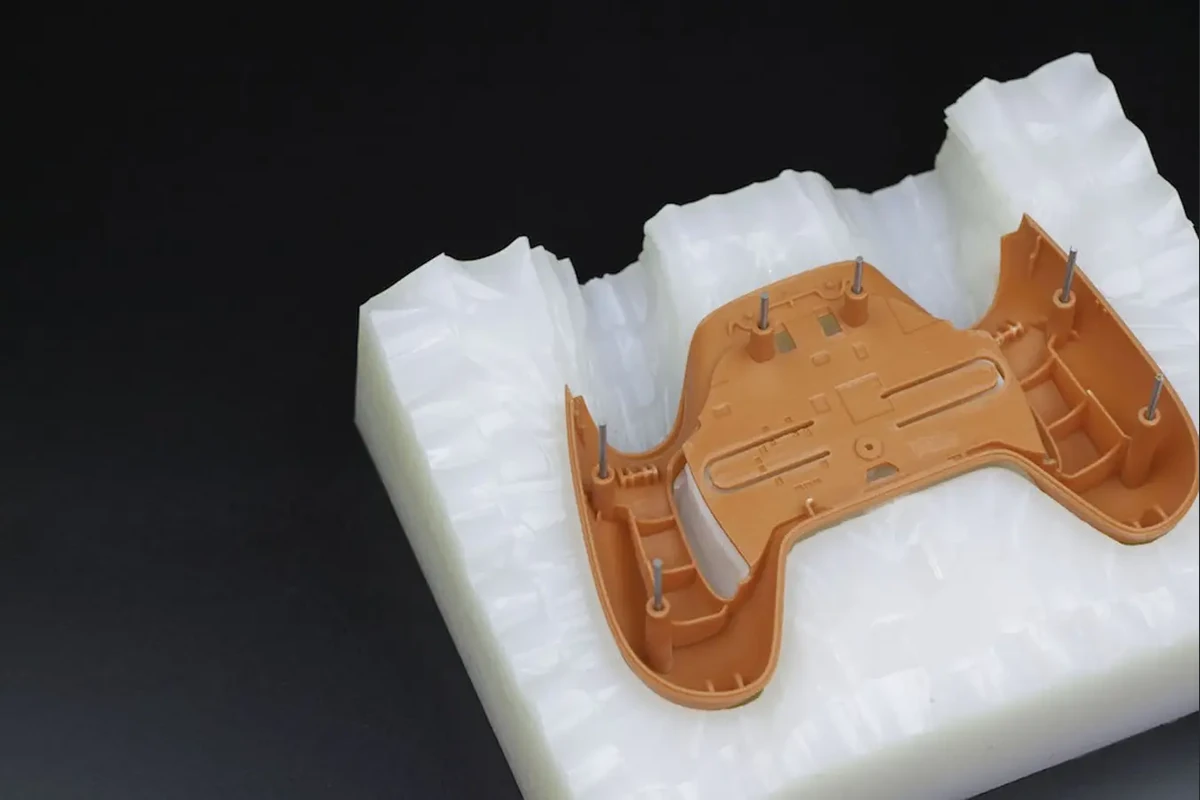
For vacuum forming mold 3d printing applications, the printed tool acts as a buck. A hot sheet of plastic drops over the print, and a vacuum draws the sheet tight against its contours. These 3D printed elements for thermoforming molds must resist high compressive forces and thermal shock without collapsing. They also require porous internal structures or tiny drilled holes to allow the air to escape evenly.
Injection Molding Inserts
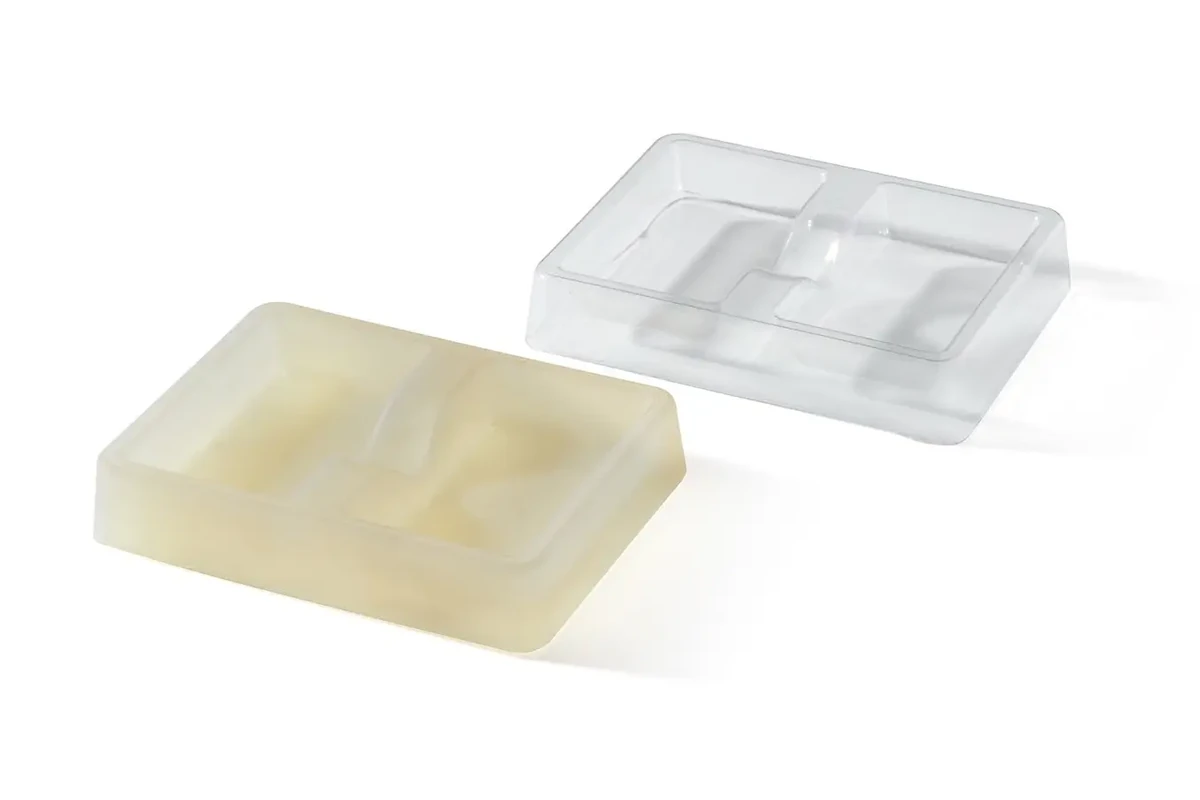
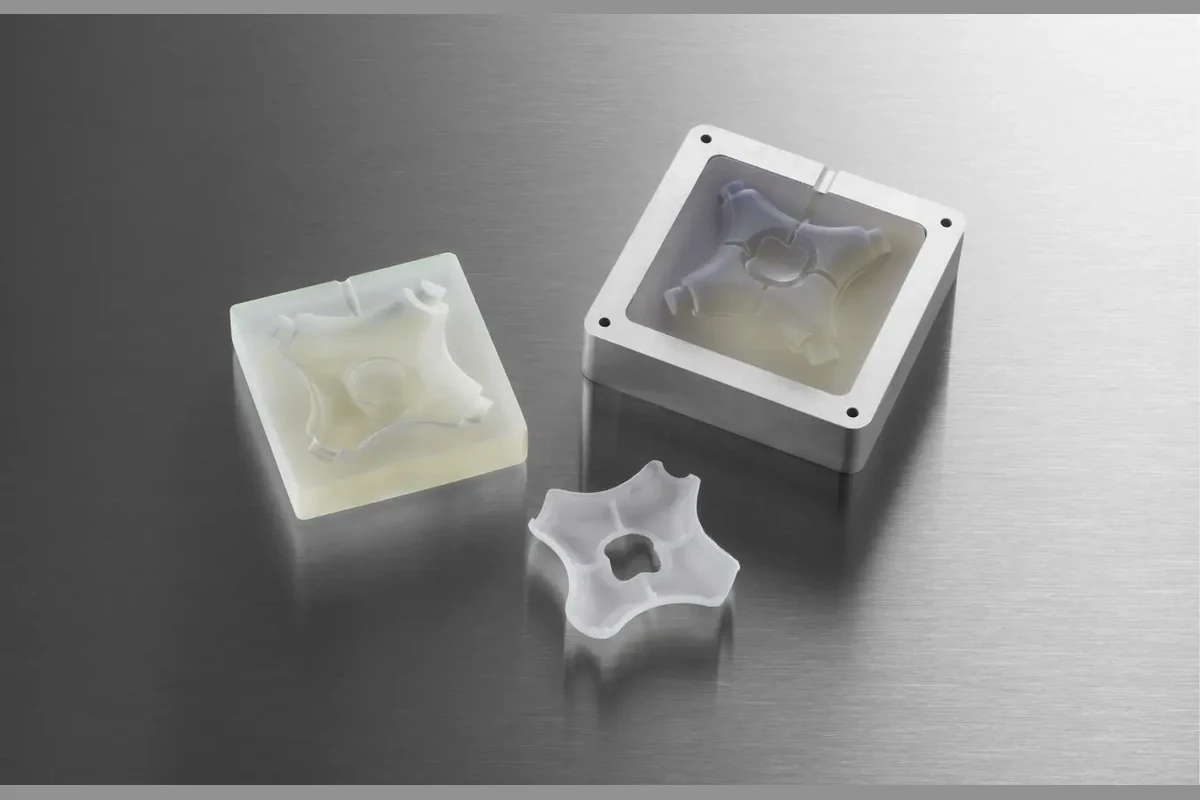
Using an injection molding from 3d printed molds workflow requires maximum thermal and mechanical resilience. Instead of printing a freestanding mold, you print inserts that slide into a universal metal master mold base. This hybrid method utilizes the strength of the steel frame to handle high clamping forces, while the 3d printed injection mold insert defines the complex geometry of the low-volume plastic part.
Concrete, Soap, Candle, and Plaster Molds
Beyond industrial resins, additive tooling works well for artistic and artisanal materials. Creators regularly produce 3d printed molds for concrete architectural tiles, 3d printed molds for soap making, 3d printed molds for candles, and detailed 3d printed molds for chocolate production. For culinary tasks, choosing a food safe 3d printed molds material is paramount, along with proper sealing to prevent bacteria from lodging inside microscopic layer lines.
Related: 10 Best Resin 3D Printers in 2026: Tested Picks for Every Budget
Best 3D Printing Materials for Mold Making
Your choice of printing material dictates how well your tool survives chemical reactions, mechanical pressure, and temperature spikes. Mixing the wrong polymer with the wrong casting agent leads to warped parts and failed demolding.
PLA for Simple Silicone Molds
When your goal is learning how to create silicone molds for non-thermal applications, PLA molds for casting are an excellent, accessible choice. PLA exhibits minimal warp during printing and provides high dimensional accuracy. Because room-temperature vulcanizing (RTV) silicone cures without significant heat generation, PLA withstands the process well. However, its low thermal resistance makes it unsuitable for direct resin or hot wax casting.
PETG for Improved Durability
For direct resin casting with 3d printed molds, PETG offers a major upgrade over PLA. PETG molds for resin casting provide higher chemical resistance against aggressive solvent systems found in industrial resins. It also withstands higher temperatures, surviving the exothermic heat spike produced as thick sections of epoxy or polyurethane cure.
ABS and ASA for Higher Temperatures
When transitioning to demanding applications like low-pressure injection molding or thermoforming, choose ABS or ASA. Using ABS molds for injection molding allows the tool to survive temperatures up to 100 degrees Celsius without structural failure. ABS can also be smoothed with acetone vapor, eliminating layer lines and significantly reducing the force needed to extract the molded part.
Nylon and Engineering Filaments for Industrial Applications
For high temperature 3d printed molds, engineering materials like Nylon, Polycarbonate (PC), or carbon-fiber composites provide excellent performance. These filaments tolerate substantial mechanical loads and thermal stress, making them ideal for prototype tooling using 3d printing where the tool interacts with molten production polymers or harsh chemical catalysts.
Resin Printing for Fine Details and Smooth Surfaces
When visual quality is critical, mold making with resin printers beats filament-based methods. Stereolithography (SLA) and Digital Light Processing (DLP) printers use liquid photopolymers to generate completely solid blocks with virtually invisible layer lines. Selecting the best resin for 3d printed molds—such as high-temperature or ceramic-filled formulations—allows you to cast high-fidelity parts with excellent surface finish right off the print bed.
How to Design a 3D Printed Mold for Successful Casting
A successful mold design requires careful engineering in your CAD software. Designing a functional mold cavity demands specific allowances for draft angles, venting, and structural support.
Single-Part vs Multi-Part Mold Design
Simple shapes with a flat face work perfectly in open-face, single-part molds. However, complex 3D objects require multi-part configurations to prevent interlocking locks. When designing reusable 3d printed molds with two or more interlocking segments, ensure the split line matches the widest cross-section of your part to avoid trapping it inside the tool.
Draft Angles and Part Removal
Perpendicular walls cause friction that can tear flexible materials or crack rigid plastics during demolding. Incorporate consistent draft angles into your 3d printed mold design tips. A minimum draft angle of 1 to 2 degrees helps cast parts slide out smoothly. For deep cavities or textured surfaces, increasing the draft to 3 or 5 degrees prevents surface scraping during ejection.
Adding Registration Keys and Alignment Features
Multi-part molds must align perfectly to prevent unsightly parting line mismatches. Incorporate interlocking registration keys—such as matching hemispherical pins and sockets—directly into the mold flanges. These features lock the mold halves together precisely, ensuring perfect alignment under clamping pressure.
Venting and Air Escape Channels
As liquid compound enters your mold cavity, it displaces air. If that air cannot escape, it compresses into pockets, causing incomplete fills and surface voids. Add narrow venting channels (0.5mm wide) at the highest points of the cavity and within trapped pockets. These channels allow air to escape ahead of the rising liquid front without leaking significant amounts of casting material.
Wall Thickness and Structural Strength
Liquid resin and packed concrete place substantial hydrostatic pressure on mold walls. If the walls are too thin, they flex outward, ruining part dimensions. Maintain a minimum wall thickness of 8mm to 12mm for small tools, and increase it for larger volumes. Add external ribs or gussets to reinforce flat surfaces against outward bowing.
Related: Best Budget 3D Printers in 2026: Affordable Options for Every Maker
Preparing Your CAD Model for Mold Printing
Transforming a finished part design into a functional mold requires specific geometric conversions in your slicing software and CAD program.
Determining Parting Lines
The parting line defines where your mold segments separate. Examine your model carefully to identify the optimal split line. Position this line along sharp edges or natural design transitions wherever possible. This placement ensures that any flash or witness marks left behind are easy to clean up during post processing steps.
Accounting for Material Shrinkage
All casting compounds shrink as they cool or cross-link. Silicone shrinks minimally (often under 0.5%), while polyurethane resins can shrink by 1% to 2%. To maintain precise dimensional accuracy on your final cast components, scale up your CAD master or negative cavity by the exact shrinkage factor of your chosen casting material before hitting print.
Designing for Easy Demolding
Incorporate dedicated pry slots or threaded ejection screw holes along the external flanges of your mold. These slots let you insert a non-marring tool to separate the halves evenly without damaging the mating faces or scratching the internal cavity surfaces.
Export Settings and File Preparation
When exporting your design to an STL or 3MF file, use a high polygonal resolution. Standard 3D prints show facet lines if the export resolution is too low. Ensure your chord deviation settings are tight enough to render smooth curves, preventing your cast parts from showing blocky, pixelated faces.
Recommended 3D Printer Settings for Mold Production
Optimizing your slicer parameters ensures your printed tool can withstand the structural pressures and chemical reactions of casting.
Layer Height Recommendations
To minimize surface roughness and post-processing labor, pick your layer heights carefully based on your printer type.
| Printer Type | Recommended Layer Height | Primary Benefit |
|---|---|---|
| FDM (Filament) | 0.10mm – 0.15mm | Reduces layer ridges, simplifies sanding |
| SLA (Resin) | 0.025mm – 0.05mm | Exceptional detail, smooth surfaces out of the vat |
Wall Count and Shell Thickness
For robust FDM prints, increase your perimeter wall count. Set your slicer to use at least 4 to 6 perimeters. Solid walls stop liquid resins from seeping through the layer lines into the infill zone, preventing leaks and structural failure under load.
Best Infill Percentage for Durable Molds
Never use standard 15% infill for a compression tool or a thermoforming buck. For high mold durability in 3d printing, select a dense infill pattern like Gyroid or Grid at 35% to 50% infill. This internal framework provides excellent structural support against clamping and vacuum pressures.
Nozzle Size Considerations
Choosing the best nozzle size for printing molds depends on balancing speed and resolution. A standard 0.4mm nozzle offers an ideal balance for fine detail. If you are building large, blocky outer mold boxes where speed matters more than surface detail, switching to a 0.6mm or 0.8mm nozzle cuts print times in half while yielding thicker, stronger walls.
Print Orientation for Maximum Strength
Orient your prints so the mechanical demolding forces do not pull directly against layer adhesion lines. Arrange the cavity face upward or split the orientation so that compression forces press the layers together rather than shearing them apart.
Post-Processing Steps That Improve Mold Quality
A print fresh off the build plate is rarely ready for casting. Raw 3D prints feature micro-porosities and surface ridges that catch casting compounds and cause sticking.
Sanding and Surface Smoothing
Start with 220-grit wet sandpaper to take down major layer lines, then step up through 400, 800, and 1200-grit papers. For ABS tools, a brief vapor smoothing cycle melts away layer ridges entirely. For resin prints, a light wet-sanding removes support marks and leaves a glassy surface.
Sealing Porous FDM Prints
FDM prints are inherently porous. To prevent liquid polymers from leaking into the print layers, seal the cavity with a thin coat of high-quality epoxy resin or a clear acrylic polyurethane spray. Apply the sealer in thin coats, sanding lightly between layers to preserve your dimensional tolerances.
Applying Mold Release Agents
Without a proper barrier, many resins will bond permanently to your plastic tool. Always apply a dedicated 3d printed mold release agent before pouring material. Use a high-quality mold release spray for complex geometries, ensuring it reaches deep into crevices. For silicone pouring, use a specialty release agent designed to prevent silicone-to-plastic adhesion.
Testing for Leaks and Imperfections
Before mixing expensive casting resins, assemble your empty mold, clamp it tight, and perform a water leak test. If water seeps through the seams or walls, seal those areas. Dry the mold thoroughly before starting your actual production run.
Related: Is PLA Food Safe? The Complete 2026 Guide
Step-by-Step Guide to Making a 3D Printed Silicone Mold
Follow this direct process to create a durable, highly accurate silicone tool using a printed master housing.
Printing the Master Mold
Print your negative mold container or your positive master part using the material and slicer settings outlined above. Keep walls thick and registration pins pronounced.
Preparing the Surface
Sand away visible layer ridges. Clean the entire assembly with isopropyl alcohol to remove skin oils, dust, and sanding debris. Apply a light, even coat of mold release spray and allow it to dry completely.
Pouring and Curing Silicone
Mix your two-part RTV silicone according to the manufacturer’s weight ratio. If available, place the mixed liquid in a vacuum degassing chamber to pull out trapped air. Pour the silicone into the lowest point of the mold frame in a slow, thin stream. This technique helps the liquid displace air naturally, avoiding surface bubbles. Allow it to cure fully for the recommended 12 to 24 hours.
Removing and Finishing the Mold
Gently unscrew your outer mold frame or use your pry slots to split the halves. Slowly peel the flexible silicone tool away from the printed master. Inspect the interior cavity for defects; it is now ready to serve as a durable, reusable tool for casting other resins.
Step-by-Step Guide to Resin Casting with 3D Printed Molds
Direct resin casting requires careful management of temperature and chemical curing profiles.
Selecting the Right Resin
Match your resin choice to your mold material. Epoxy resins cure slowly and generate less peak heat, making them safe for most plastics. Polyurethane casting resins cure quickly and can get hot, requiring a resilient mold material like PETG, ABS, or high-temperature resin.
Mixing and Pouring Techniques
Measure your resin components precisely using a digital scale. Mix thoroughly, scraping the sides and bottom of your mixing cup. Pour the mixed resin smoothly into your prepared, pre-released 3D printed tool, keeping the pour spout close to the tool surface to minimize air entrapment.
Preventing Bubbles and Defects
To achieve a flawless surface, place the filled mold inside a pressure pot pressurized to 40-50 PSI. The atmospheric pressure shrinks any remaining air bubbles down to a microscopic size, forcing them into solution and leaving crystal-clear, defect-free castings.
Demolding and Post-Curing
Allow the resin to cure until it passes its peak exotherm and solidifies completely. Use your integrated pry slots to separate the mold halves evenly. Carefully pull the casting from the cavity. If required by the resin manufacturer, place the cast part into a curing oven to complete its cross-linking and reach full mechanical strength.
Using 3D Printed Molds for Small Batch Production
Scaling up from a single prototype to low-volume production runs requires managing your tooling life cycles and cost efficiencies.
Expected Mold Lifespan
A 3D printed tool will not last indefinitely like a hardened steel tool. An FDM mold used for direct polyurethane casting typically lasts between 10 and 50 cycles before the plastic degrades from thermal stress and mechanical wear. SLA resin molds can last up to 50 to 100 cycles if handled with care and treated regularly with release agents.
Production Volume Recommendations
| Production Target | Optimal Tooling Approach |
|---|---|
| 1 – 10 Parts | Direct FDM or SLA printed molds |
| 10 – 100 Parts | Printed master positive -> Silicone working mold |
| 100 – 500 Parts | High-temp printed inserts inside a metal mold base |
| 500+ Parts | Traditional CNC machined aluminum or steel tooling |
Reducing Costs Per Part
To minimize your cost-per-part during small runs, optimize your printing efficiency. Use sparse infill for the outer structural support blocks and concentrate dense material only around the active mold cavity. Reuse outer support frames across multiple projects by printing modular cavity inserts that slide into a single master housing.
When to Upgrade to Metal Tooling
When your volume targets pass several hundred units, or when your part requires production polymers injected at high pressures and temperatures, it is time to transition away from plastic tooling. Use your 3D printed mold data to finalize your design, confident that your geometry is fully validated before investing in permanent steel or aluminum molds.
Common Problems and How to Avoid Them
Even experienced toolmakers encounter occasional failures. Recognizing these common failure modes early keeps your project on track.
Parts Sticking to the Mold
If your cast part fuses permanently to your tool, you likely skipped surface sealing or used an incompatible release agent. Raw FDM layer lines act like microscopic hooks that mechanically lock onto casting compounds. Ensure your mold surfaces are thoroughly sealed with an epoxy coating or acrylic clear coat, and always apply a proper release agent before every pour.
Surface Imperfections on Cast Parts
Pockmarks and surface texture issues on your cast parts usually stem from trapped air or uncured resin on the mold face. If using SLA resin prints, ensure the tool is fully washed in clean alcohol and thoroughly post-cured. Any uncured liquid photopolymer left on the mold face can chemically inhibit the curing of silicone or polyurethane casting compounds, leaving a sticky, deformed surface.
Mold Warping from Heat
Thick sections of casting resin generate substantial exothermic heat. If this heat exceeds the Heat Deflection Temperature (HDT) of your mold plastic, the tool walls will soften and bow outward. If you notice warped parts, switch your mold material to a higher-temperature polymer like ABS, polycarbonate, or a specialized high-temperature SLA resin.
Cracks and Premature Mold Failure
Sharp internal corners act as stress concentrators. Under the mechanical strains of demolding, these sharp areas can develop cracks, leading to catastrophic tool failure. Always add generous fillets (radii of 1mm to 3mm) to all internal corners in your mold design to distribute stress evenly.
Dimensional Accuracy Issues
Plastic shrinkage and printer calibration errors can alter your final part dimensions. Regularly check your 3D printer’s step calibration. Always remember to scale up your negative mold cavity design by the specific shrinkage rate of your casting compound to guarantee your finished parts meet your required tolerances.
3D Printed Molds vs Traditional Mold Manufacturing
Understanding how additive tooling compares to conventional machining helps you make the right choice for your budget and timeline.
Cost Comparison
Traditional steel or aluminum tooling carries high upfront design and machining costs. 3D printed alternatives require only a fraction of that investment, charging you just for the raw polymer used. This cost structure shifts the financial break-even point in favor of additive methods for low-volume manufacturing runs.
Speed of Production
CNC tooling can take weeks to source, machine, test, and ship. A 3D printed tool goes from a CAD concept to a physical mold on your workbench in hours. This rapid turnaround time lets you identify design flaws and implement adjustments long before a traditional machine shop could deliver an initial sample.
Durability and Production Capacity
Metal tools withstand hundreds of thousands of cycles under intense heat and pressure. 3D printed plastic molds are sacrificial by comparison, degrading after dozens or hundreds of cycles. For true mass production, metal remains essential; for rapid tooling and nimble low-volume runs, plastic molds excel.
Accuracy and Surface Finish
High-end CNC machinery produces exceptionally smooth surface finishes and holds incredibly tight tolerances (down to microns). While SLA resin printing can approach this fidelity, standard FDM prints require hand-sanding and surface sealing to match the smooth, glossy surface finish expected of polished metal tooling.
Related: Best Glue for PLA: Top Adhesives for Strong 3D Printed Parts in 2026
Real-World Applications of 3D Printed Molds
Engineers and creatives across various industries rely on additive tooling to solve complex design and production challenges.
Product Prototyping
Designers frequently use printed tools to prototype rubber overmolds, soft-touch buttons, and flexible gaskets. This approach allows them to test actual elastomeric materials during the prototyping phase, ensuring the design functions as intended before initiating full production.
Jewelry and Art Casting
Artisans use high-resolution resin prints to build complex investment patterns for lost wax casting 3d printing workflows. The printed part burns out cleanly inside a kiln, leaving a perfect plaster cavity ready for metal casting with 3d printed molds to create intricate bronze or silver pieces.
Automotive Components
Restoration shops and racing teams utilize additive tooling to manufacture low-volume production molds for obsolete plastic lenses, specialized interior knobs, and custom silicone ducting. This approach keeps rare vehicles operational without requiring expensive factory tooling.
Consumer Product Development
Startups use 3D printed injection mold inserts to manufacture initial product batches for crowdfunding campaigns and field test groups. This strategy gets real products into users’ hands quickly, bringing in early revenue to fund permanent hard tooling later.
Educational and Research Projects
University laboratories use additive mold making to produce custom microfluidic chips, specialized soft robotics components, and custom test specimens. This capability gives students and researchers hands-on experience with advanced manufacturing processes at a minimal cost.
Expert Tips for Making Longer-Lasting 3D Printed Molds
Extend the working life of your custom additive tools by adopting these practical, professional shop floor habits.
Selecting the Right Material for the Job
Match your material to your production goals. Do not use PLA for direct resin casting or high-temperature work. Invest in PETG, ABS, or specialized engineering resins to ensure your tool survives the chemical and thermal stresses of your casting process.
Using Reinforcement Features
Incorporate external structural ribs, thick flanges, and robust perimeter walls into your CAD models. If your mold handles heavy compaction forces (like concrete or plaster), design a rigid external frame out of plywood or aluminum to support the printed insert.
Managing Heat and Pressure
Allow your mold to cool completely between casting cycles. Accumulating exothermic heat from successive resin pours will prematurely degrade plastic tools. If you need to accelerate production, set up a cooling fan or print multiple identical mold cavities to rotate through your workflow.
Maintaining Mold Surface Quality
Clean your mold cavities gently after each demolding cycle using a soft cloth and mild soapy water or isopropyl alcohol. Avoid sharp metal scraping tools that can gouge the plastic walls. Reapply your mold release agent consistently before every cycle to preserve the fine surface finish of your tool.
Related: 10 Best Beginner 3D Printers in 2026 (Easy Setup + Hands-On Tested)
Final Thoughts
Integrating 3D printing into your mold-making workflow eliminates the traditional barriers of high costs and long lead times for low-volume production. Whether you are using a desktop FDM printer to pour flexible silicone components, or deploying high-resolution SLA resin prints for precise prototype tooling, master the fundamentals of draft angles, wall thickness, and proper surface sealing.
By matching your materials to your specific production demands and applying consistent post-processing techniques, you can reliably produce high-quality, functional parts right from your workbench.
Frequently Asked Questions
Everything you need to know about making and using 3D printed molds.
Can I use a 3D printer to make molds?
Yes, you can use both FDM (filament) and SLA (resin) 3D printers to create functional negative cavities or positive master patterns. These tools work excellently for casting materials like silicone, epoxy resin, polyurethane, wax, concrete, and soap.
What is the best 3D printer for making molds?
The best choice depends on your specific part requirements. For high dimensional accuracy and smooth surface finishes with minimal post-processing, an SLA or DLP resin printer is ideal. For larger, structurally robust mold housings or vacuum forming bucks, an FDM printer utilizing filaments like PETG or ABS is highly efficient and cost-effective.
What is a good 3D printed material for making molds?
For room-temperature applications like pouring silicone, PLA works well. For direct resin casting, PETG offers superior chemical and thermal resistance. For high-temperature operations like vacuum forming or low-volume injection molding inserts, choose ABS, Polycarbonate, or specialized high-temperature engineering resins.
Can 3D printed molds be used for injection molding?
Yes, but they are intended for low-volume prototype tooling rather than mass production. By printing inserts with high-temperature materials (like filled engineering resins or polycarbonate) and mounting them inside a protective metal master mold base, you can inject real production plastics for short runs of 10 to 100 parts.
Are resin printed molds better than filament printed molds?
Resin prints are superior for parts requiring exceptional detail, thin walls, and a smooth surface finish right off the build plate. Filament (FDM) prints are typically better suited for large, bulky tools, structural support frames, or vacuum forming bucks that demand high impact resistance and structural infill strength.
Do 3D printed molds require a release agent?
Yes. Plastic prints feature microscopic pores and layer lines that bond easily with casting resins. To prevent your cast parts from sticking permanently and damaging your tool, always seal your prints properly and apply a high-quality mold release spray or wax before every pour.